How to connect Embloy with your ATS
This guide is for Embloy customers that want to integrate Embloy with a 3rd-party service that partners with Embloy. If you are a current or potential partner, please refer to the Partners guide or contact us directly.
Hey there! 👋 Welcome to Embloy! We are excited to have you on board. This guide will explain every step you need to take to connect Embloy with your existing ATS.
Prerequisites
-
You are currently using an external ATS system
-
The ATS system has an Embloy integration
Step 1: Create an account
If you haven't already, you can create an Embloy account by visiting our registration page. You can also sign up using your Google, LinkedIn, Microsoft, or GitHub accounts.
After you have created an account, you will receive a confirmation email. Click on the link in the email to verify your account.
Step 2: Subscribe to Embloy
Choose a plan and subscribe to Embloy. We partner up with Stripe to process payments, so you don't have to worry about us storing or processing any sensitive information.
Step 3: Enable the integration
If anything is unclear, follow the instructions shown in your ATS and if necessary, see their documentation and guides.
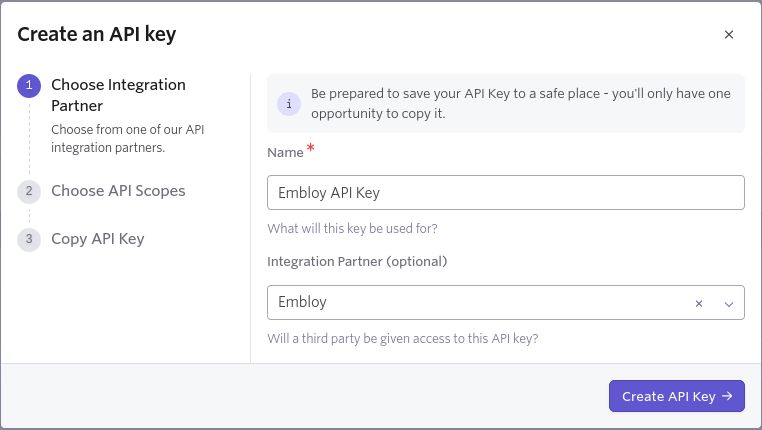
- Go to your ATS provider's admin dashboard and enable the Embloy integration. For most providers, this will prompt you to create a new API key
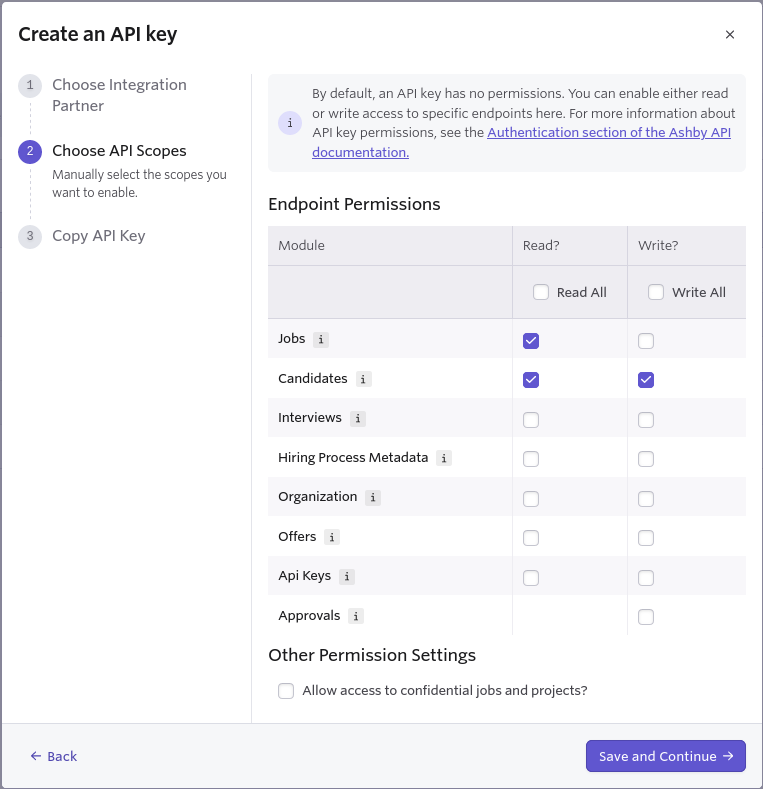
- If necessary, select the correct permissions (read job postings + read/write applications)
Step 4: Exchange API keys
Upload ATS provider's API key to Embloy
Copy and paste the API key into a new Embloy secret in the "secrets" tab of your Embloy Genius settings.
Make sure to select the name of the 3rd-party for the issuer option, as the API key can't be used otherwise.

Upload Embloy's client token to ATS provider
Finally, create a new client_token in the "secrets" tab of your Embloy Genius settings and paste it into your ATS provider's Embloy integration
By default, the client_token expires after three months, but you can customize it up to one year. However, once expired, you will have to create and upload a new one.


Conclusion
Receive applications via your ATS
-
Now that you have connected your ATS, applications submitted through Embloy will automatically be sent there so that you can process your applications as usual
-
If you need to, you can also log into our recruiter portal, screen the applications and respond to the candidates directly. However, if you are using Embloy as an integration and not as a standalone tool, we recommend you to manage your applications directly via your ATS